A. Installing the User Digital Signing Certificate (DSC)
Acknowledge & Download
Once you receive the DSC, please acknowledge it by replying to the same email address to get the Private Key (password for DSC) on your registered mobile. Download the DSC mailed to you by VPN Support (vpnservices@nic.in) and save it on your computer.
Import Certificate
> Open the downloaded certificate. A Certificate Import Wizard window will open. Select Current User as the Store Location and Click Next.
> The file path of the certificate you want to import and Click Next.

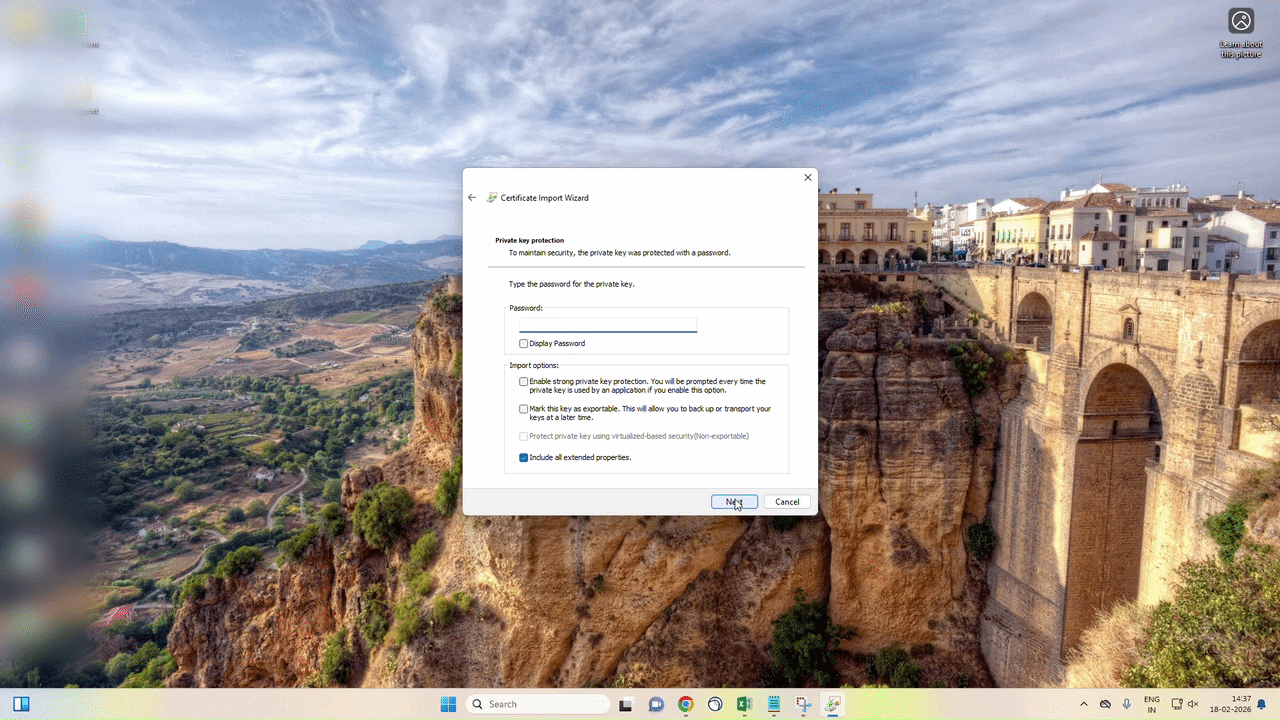
Private Key Protection
Enter the Private Key (received via SMS) in the password field. Check the box for Enable strong private key protection. (Note: You may also choose to mark the key as exportable). Click Next.
Certificate Store
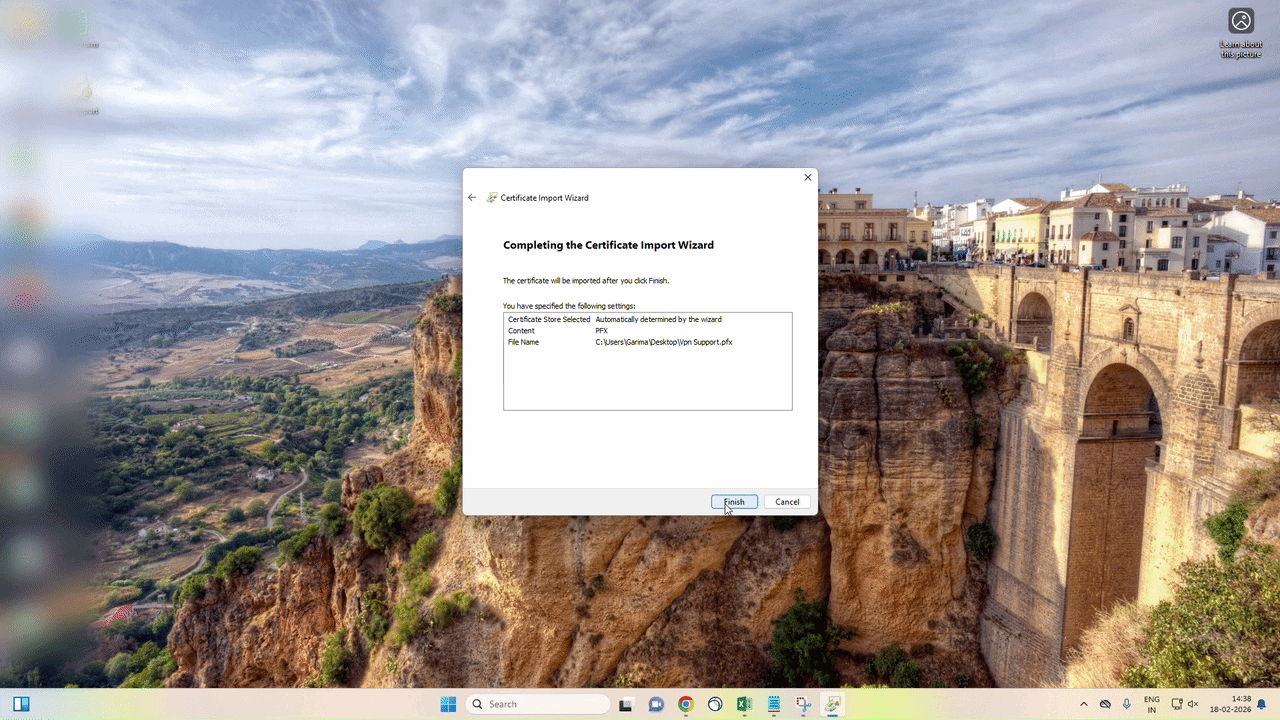
Ensure "Automatically select the certificate store based on the type of certificate" is selected and click Next.

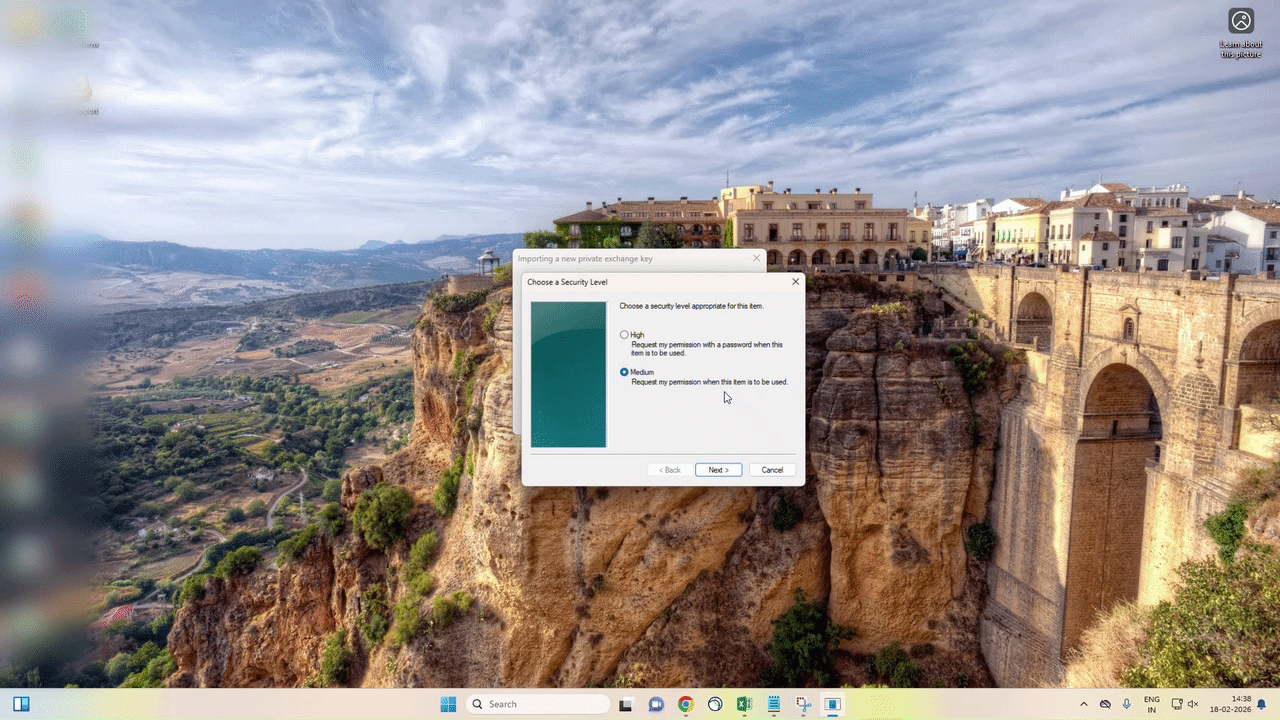
Set Security Level
Click Finish. A window will open titled "Importing a new private exchange key". Click on the Set Security Level button.
Select High Security
Set security level as High and click on Next.
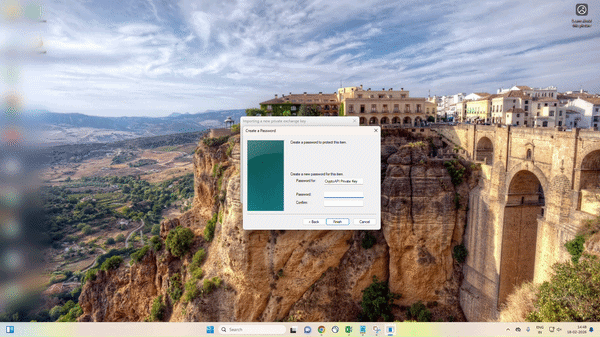
Create Password
Create a new password for this item (CryptoAPI Private Key). This will be the first password you need to enter while connecting VPN every time. Click Finish, then click OK to complete the import process.
Note: The user is advised to change the Private Key for the DSC for security purpose. Also note it down safely.
B. Verification of the installation of User DSC
Open Certificates
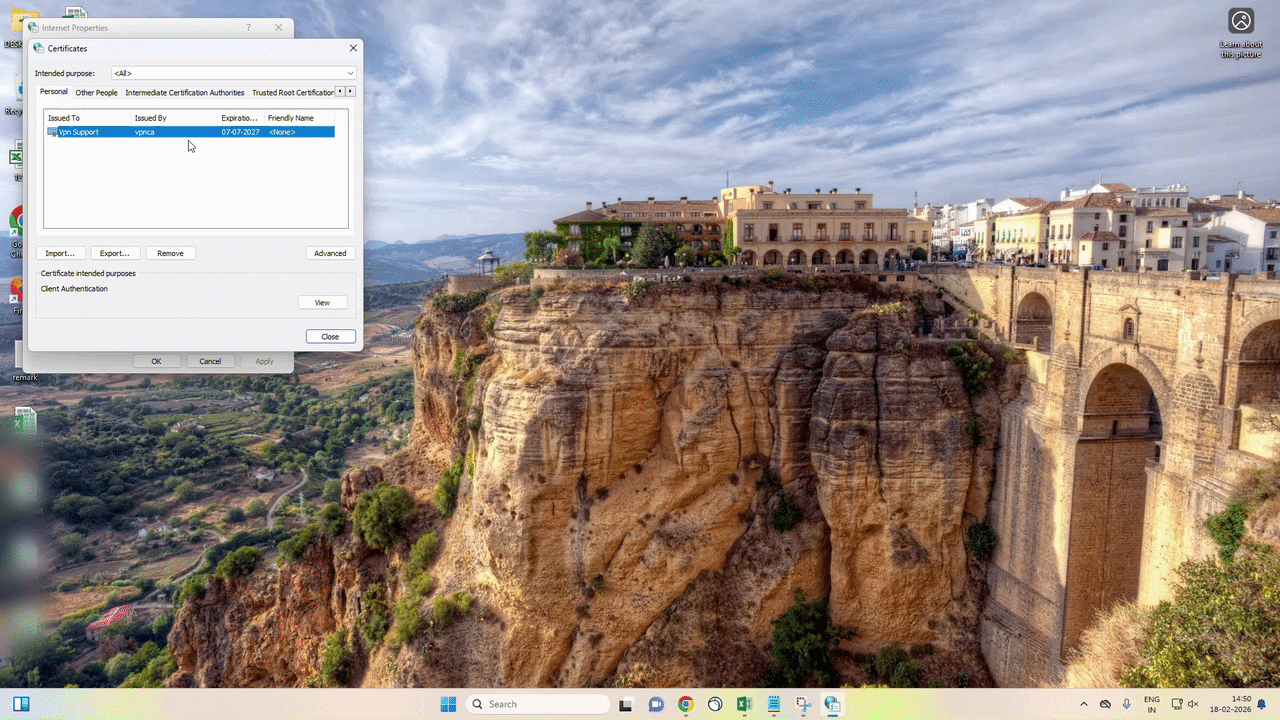
Open Internet Explorer. Go to Internet Options. Select the Content tab and click on the Certificates button.

View Certificate Details
Select the certificate issued in your name and click the View button. Verify that the name is the same as the username mentioned in your mail and verify the validity of the certificate.
C. Procedure to Connect NIC VPN in Windows
Download & Install VPN Client
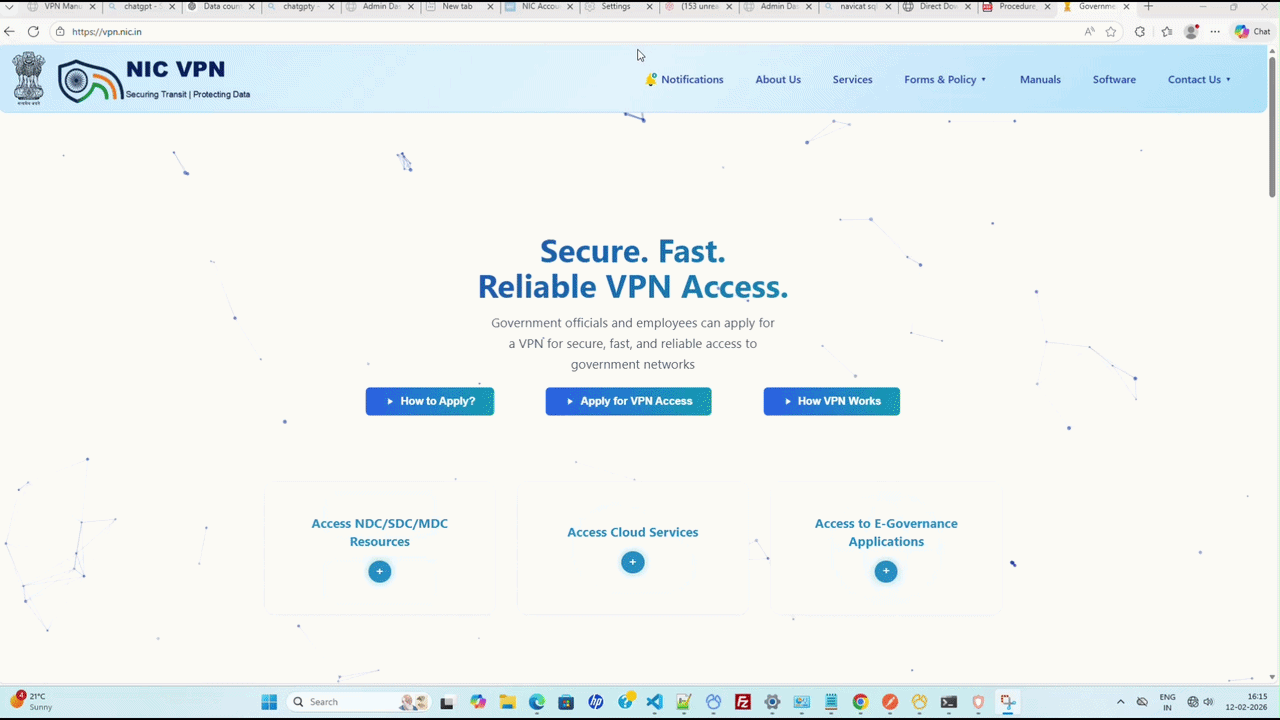
Open the website http://vpn.nic.in and download the VPN Client for Windows . Run the installer, accept the terms, and click Next/Finish to complete the installation.
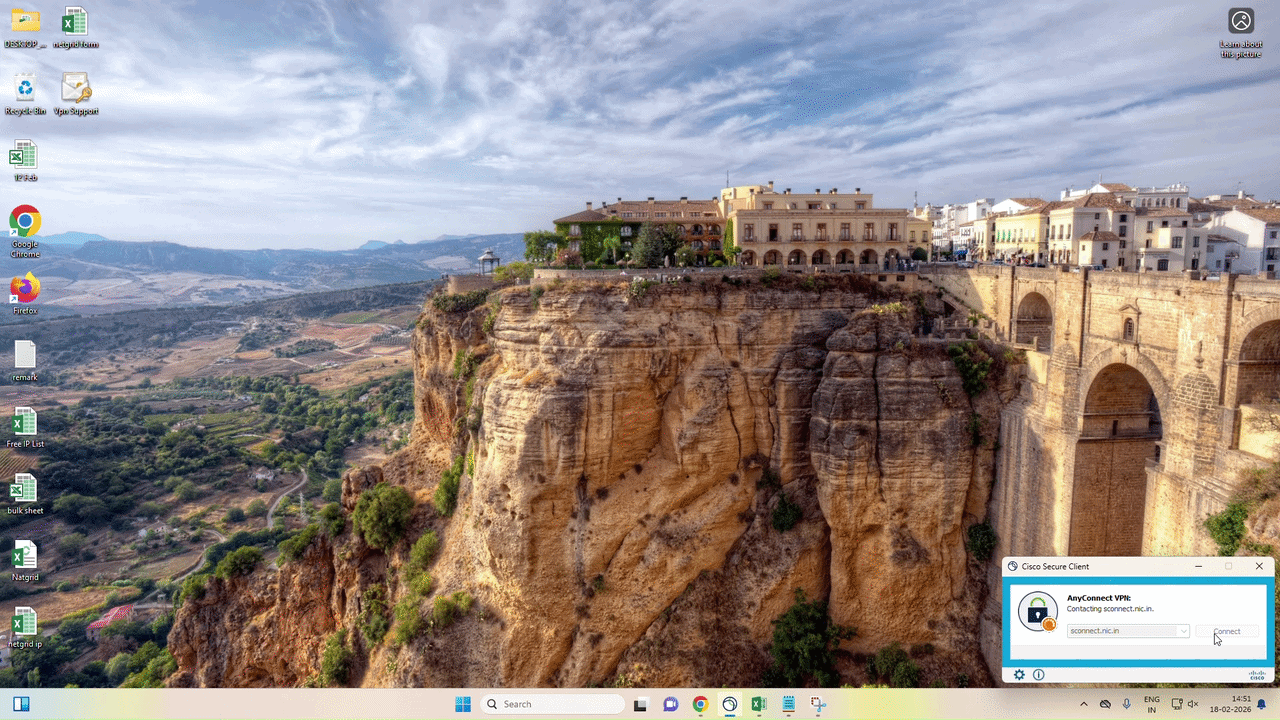
Open AnyConnect Client and Connect to Server
> Cisco AnyConnect Secure Mobility Client from the Start Menu of Windows.
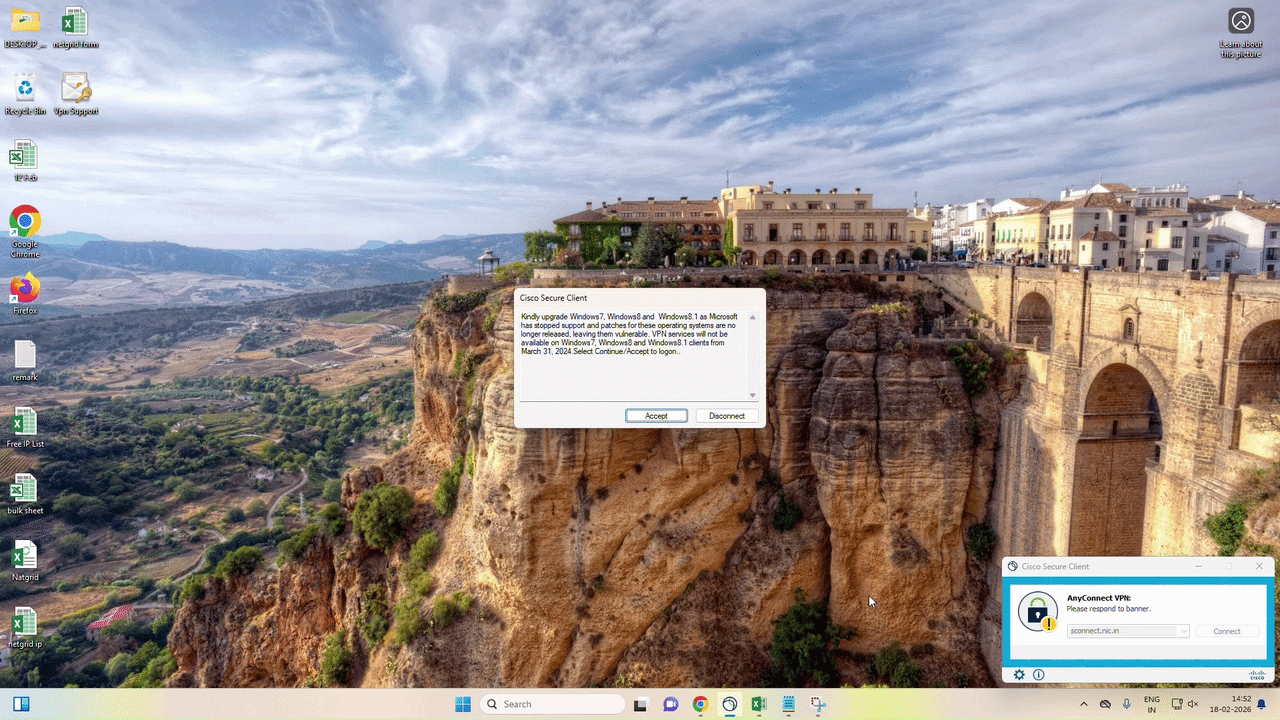
> Type sconnect.nic.in in the connection field and then click the Connect button.
Select Certificate
A "Windows Security" or "Cisco AnyConnect - Certificate Selection" window will appear. Select the correct certificate for authentication and click OK.
Enter Credentials
You will be prompted to enter the Private Key for your DSC (CryptoAPI Private Key). Enter the correct password you created in Section A (Step 7) and click OK.

First Login Password
If prompted, create a new password on first login. Click Continue.
Connection Established
Click on the Accept button on the banner page. VPN will be connected, and the VPN Homepage will open. You can now access applications or manage servers.