1. Download & Extract
Go to user's home directory
First, open a terminal and navigate to the user's home directory.
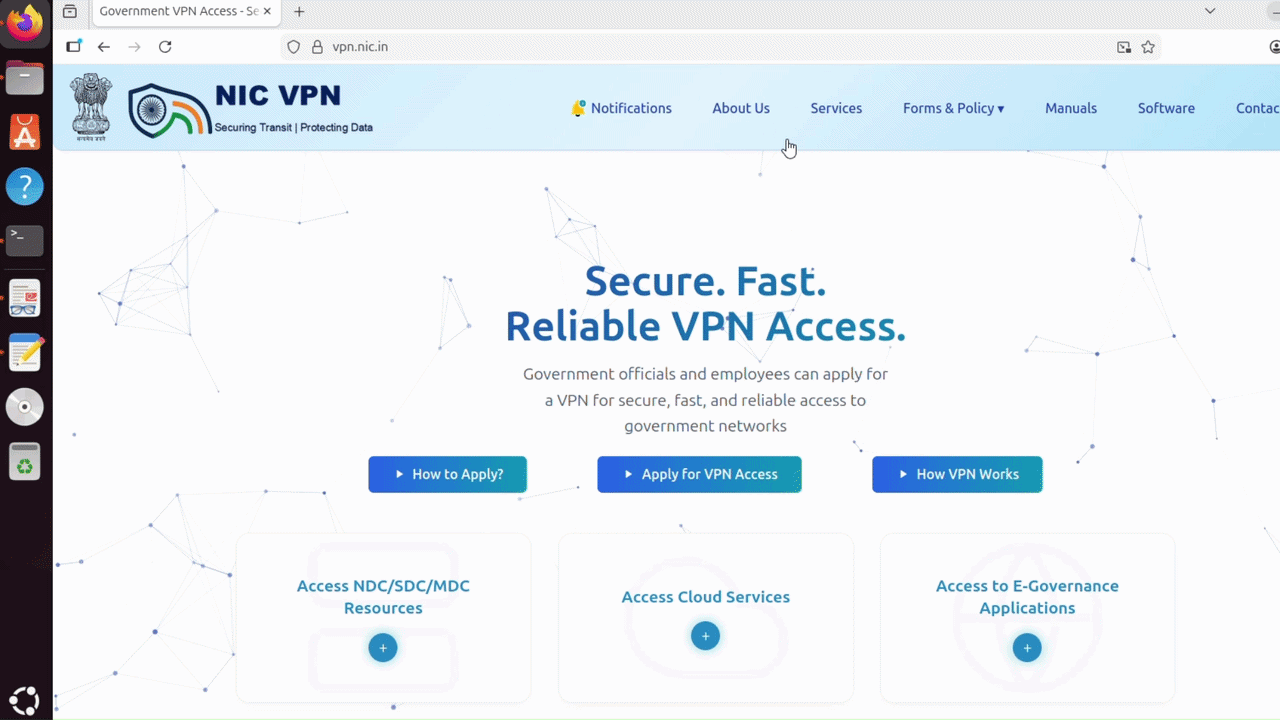
Download the Cisco AnyConnect Client
Download the Cisco AnyConnect Client from the website vpn.nic.in
Extract Folder and Install the VPN Client
Install the VPN Client by running the following commands.
2. Tool Installation
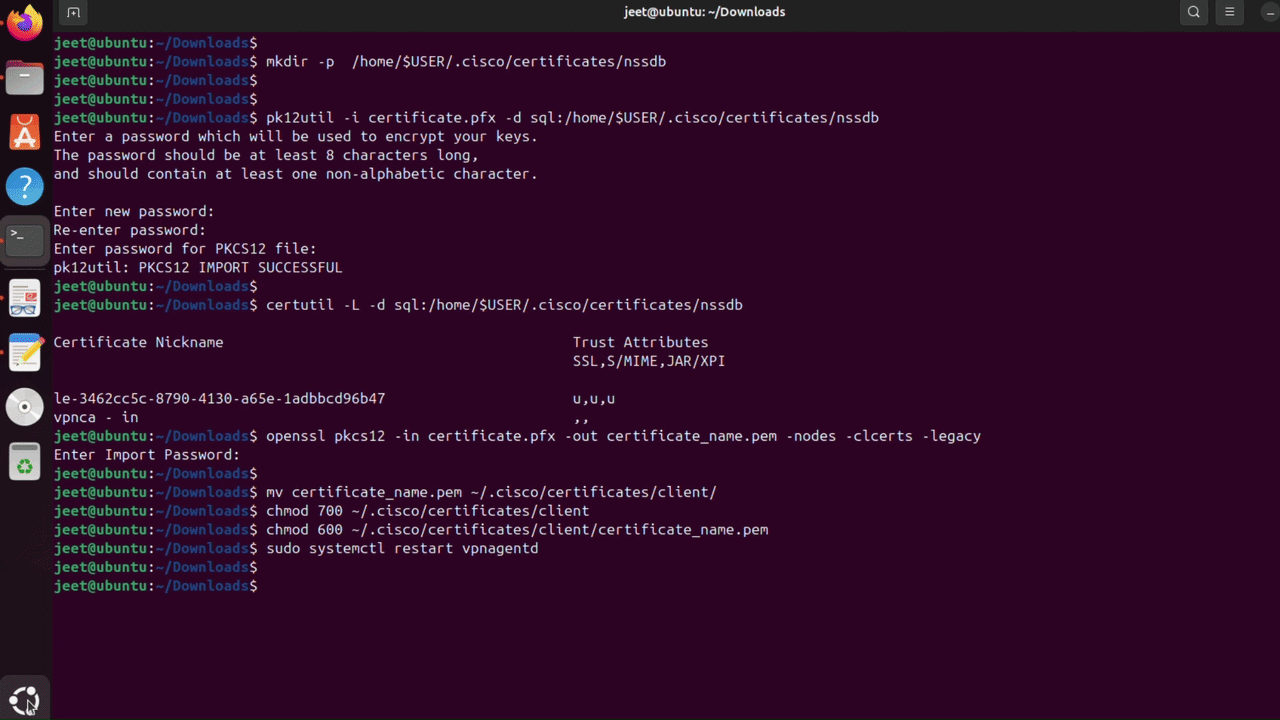
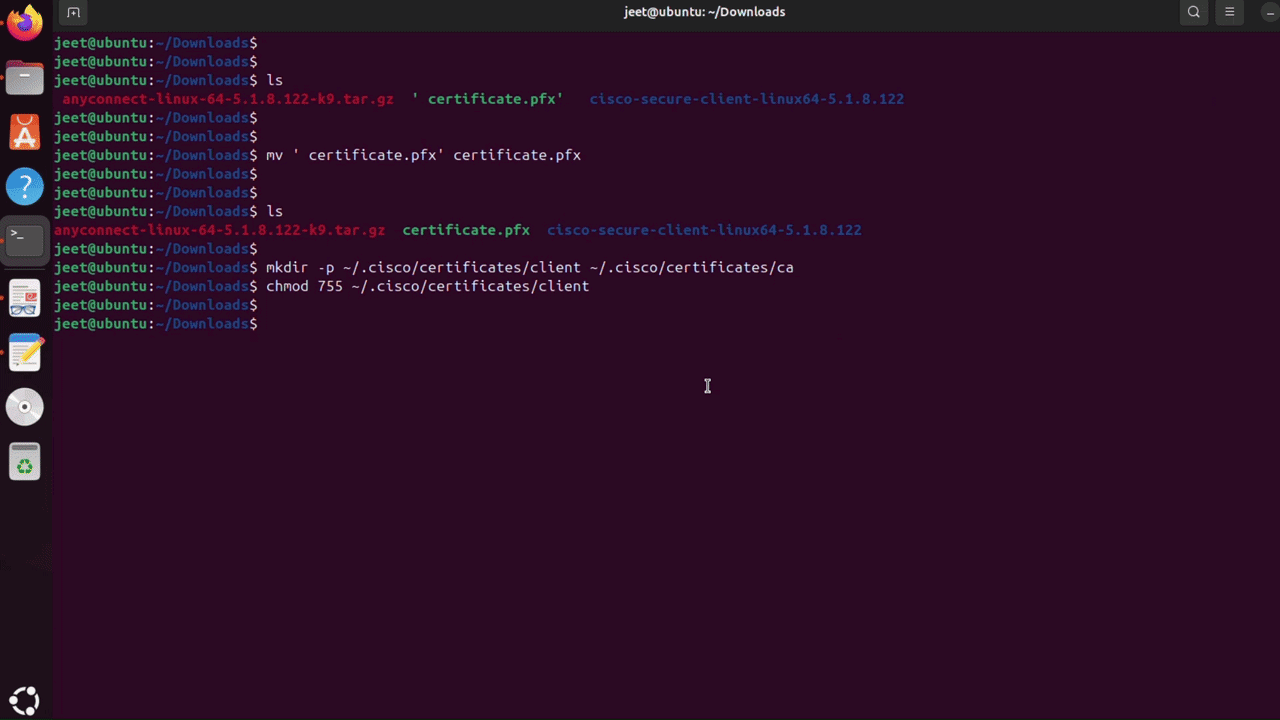
Create two folders
To store the client and CA certificates, create the following directories by running the following commands.
Install required certificate tools
Install the required certificate tools by running the following commands.
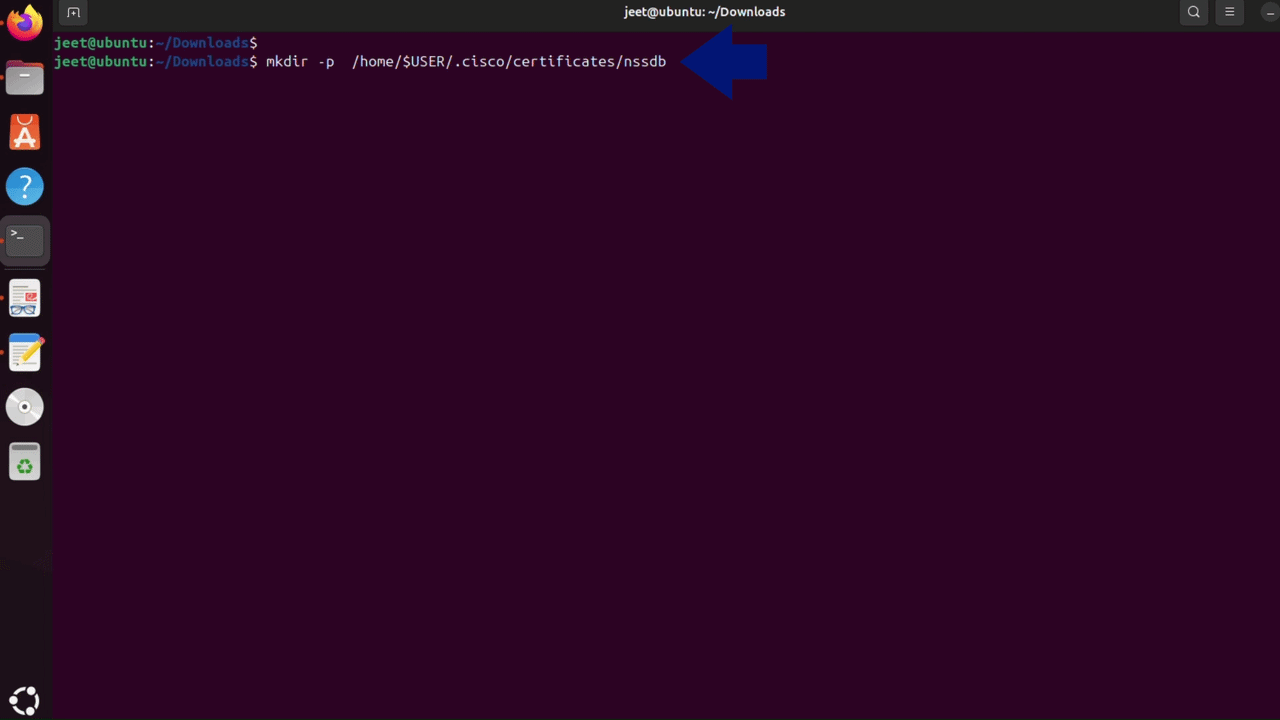
Create a directory
To store the NSS database, create the following directory by running the following command.
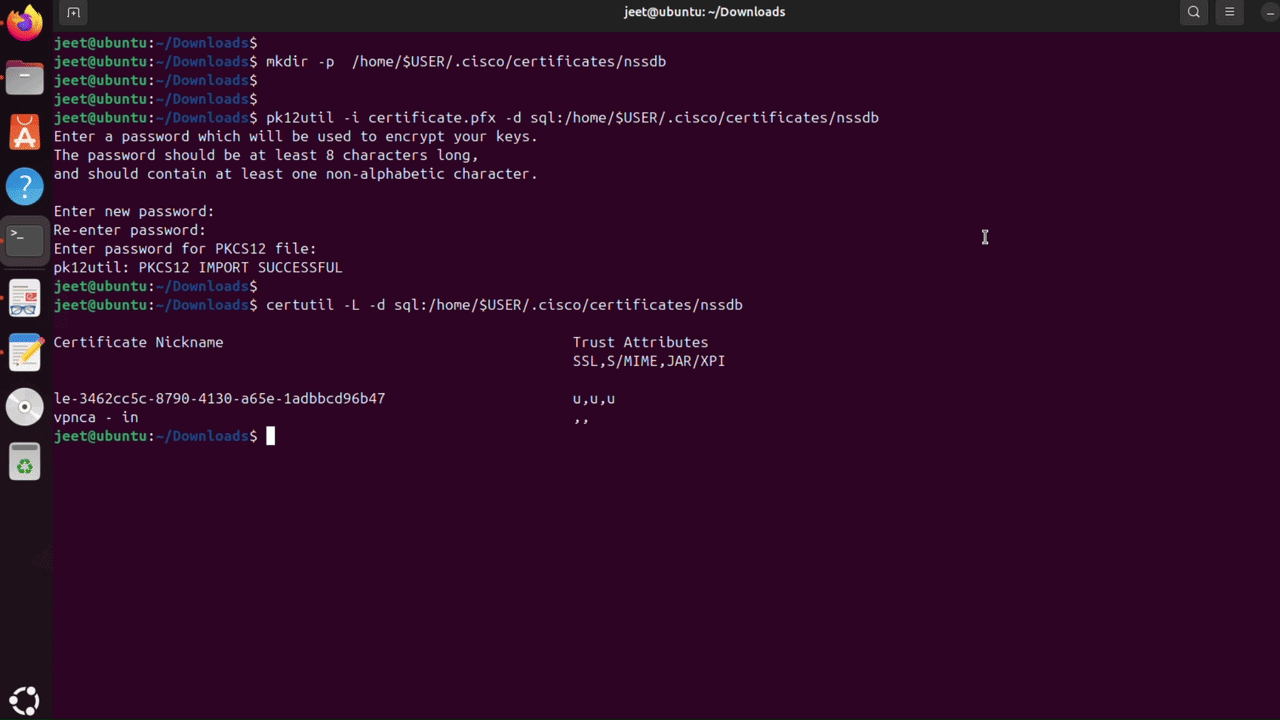
3. Import Certificate (DSC)
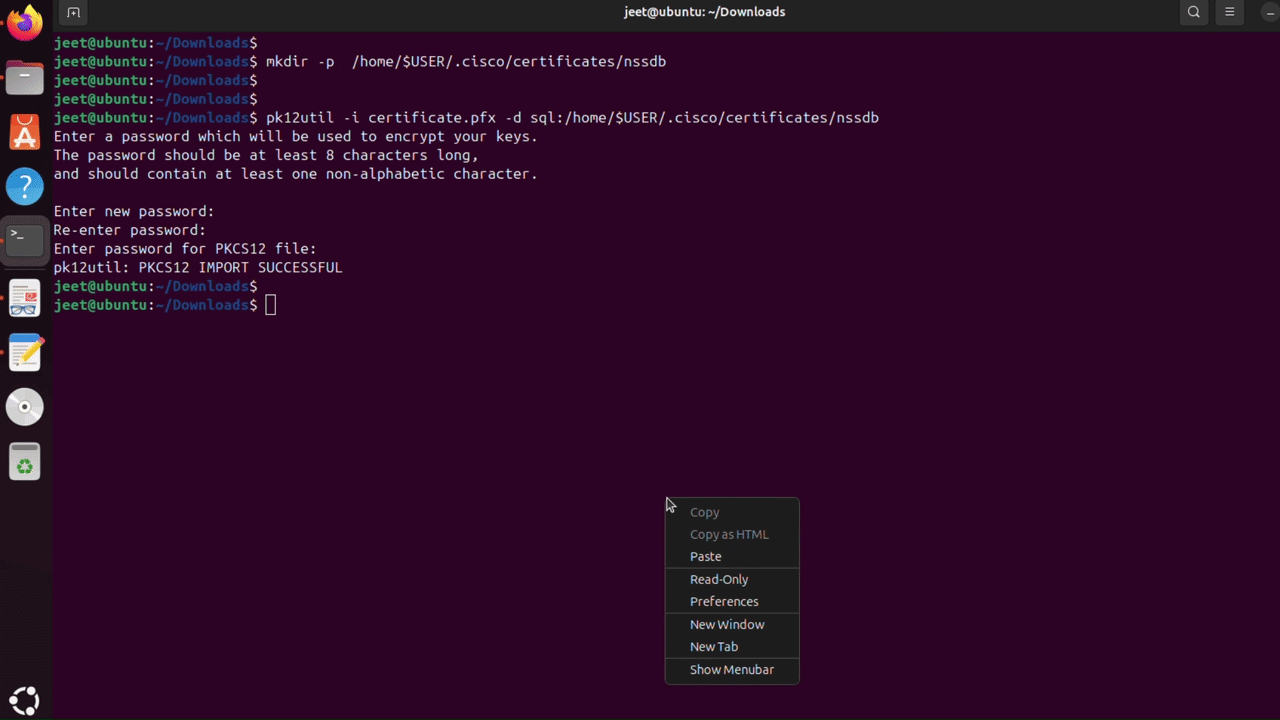
Import Certificate to NSS Database
Import the certificate to the NSS database by running the following command.
Note: The first password is of your choice for the certificate store, you can enter the password of your choice. Whereas the second password is the private key share with you on your registered contact number.
To verify the certificate in nssdb
To verify the certificate in nssdb, run the following command.
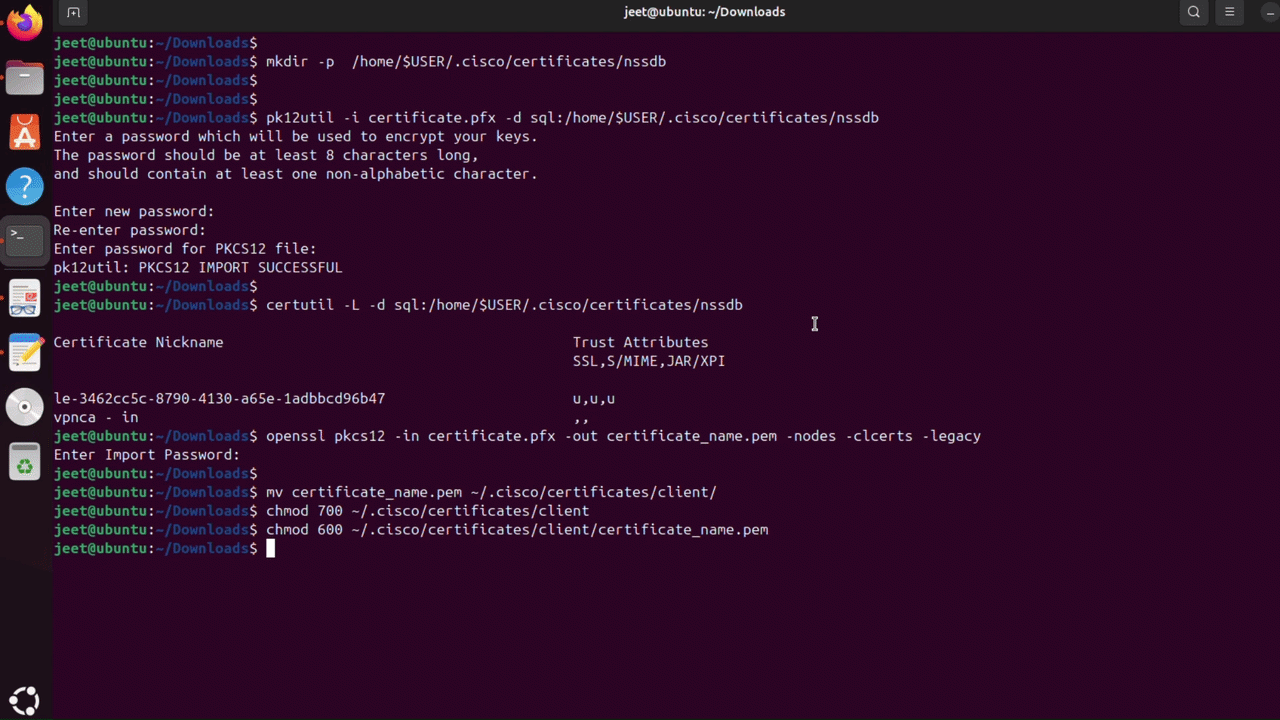
Extract and Secure PEM Certificate
Extract the PEM certificate and move it to the client certificate directory by running the following commands.
Note: Enter your private key after running first command.
4. Connect to VPN
Restart the certificate
Restart the Certificate by running the following command.
Connect to Cisco Secure Client
Connect to the Cisco Secure Client. Enter sconnect.nic.in as the server address and enter your username and password.