1. Access and Login to eForms Portal
Access Portal
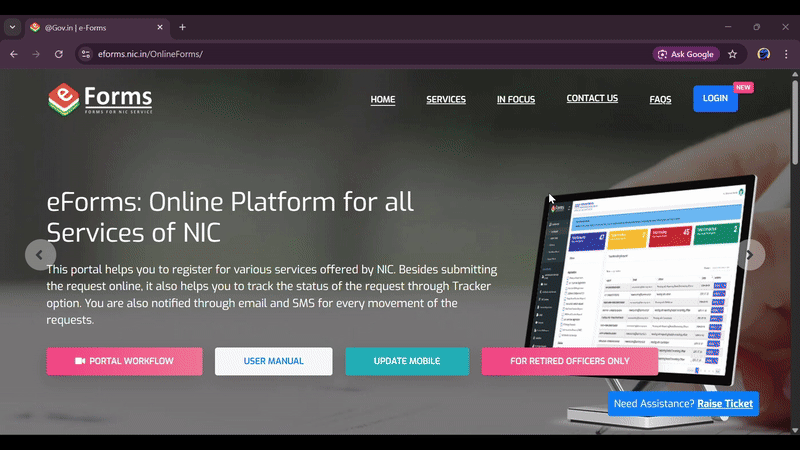
Access the site https://eforms.nic.in in any browser and click the 'OK' button on the initial 'Notice' popup.

Click Login
Click on the 'Login' option located in the top right corner of the page.
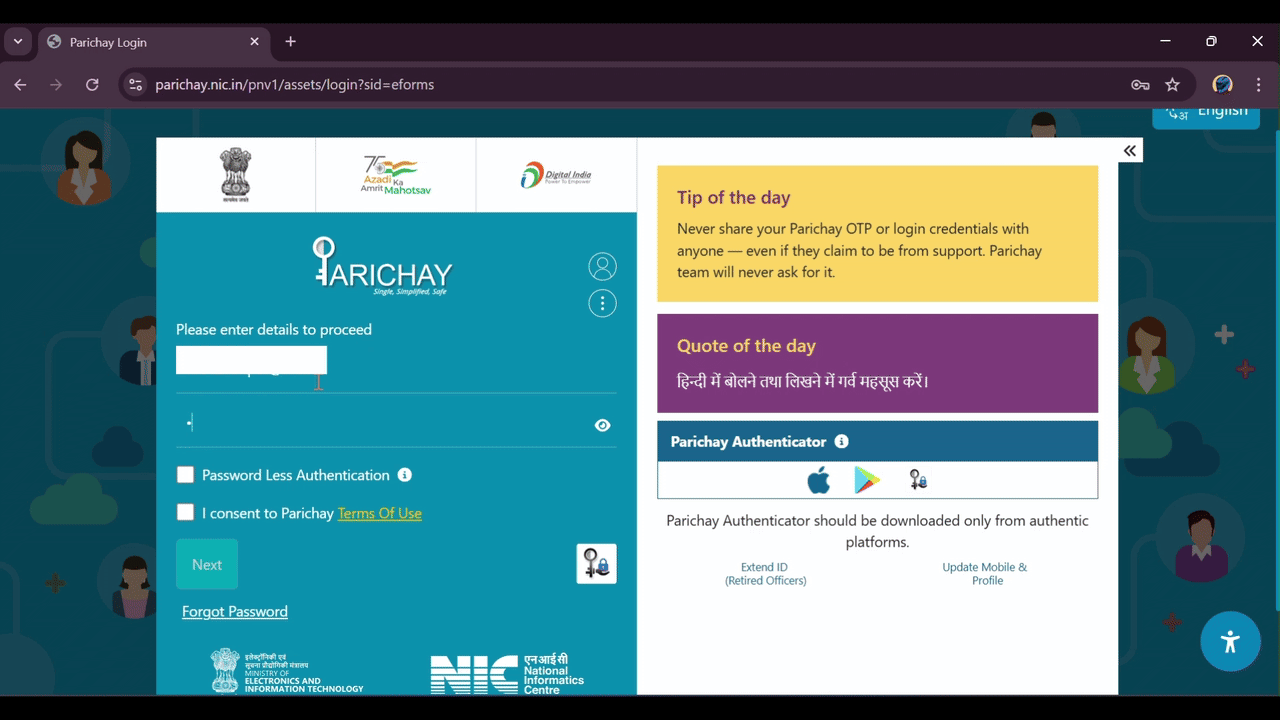
Login with Government Email
Enter your Government email id & password (e.g., @nic.in, @gov.in) and click Next.
2. Verify Mobile OTP
Verify Mobile OTP
An 'OTP' will be sent to the 'Registered mobile number' linked with your email ID. Enter the received OTP and click 'Next'. If not received, click 'Resend mobile otp'.

3. Fill User and VPN Details
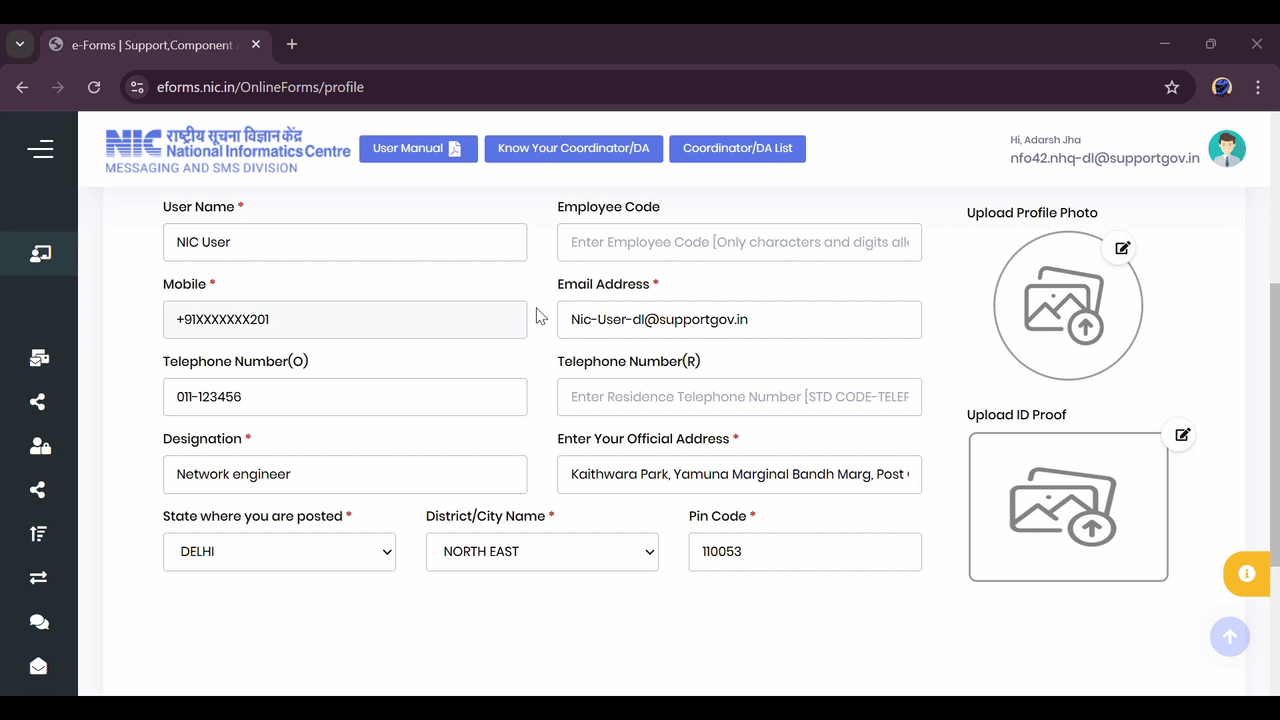
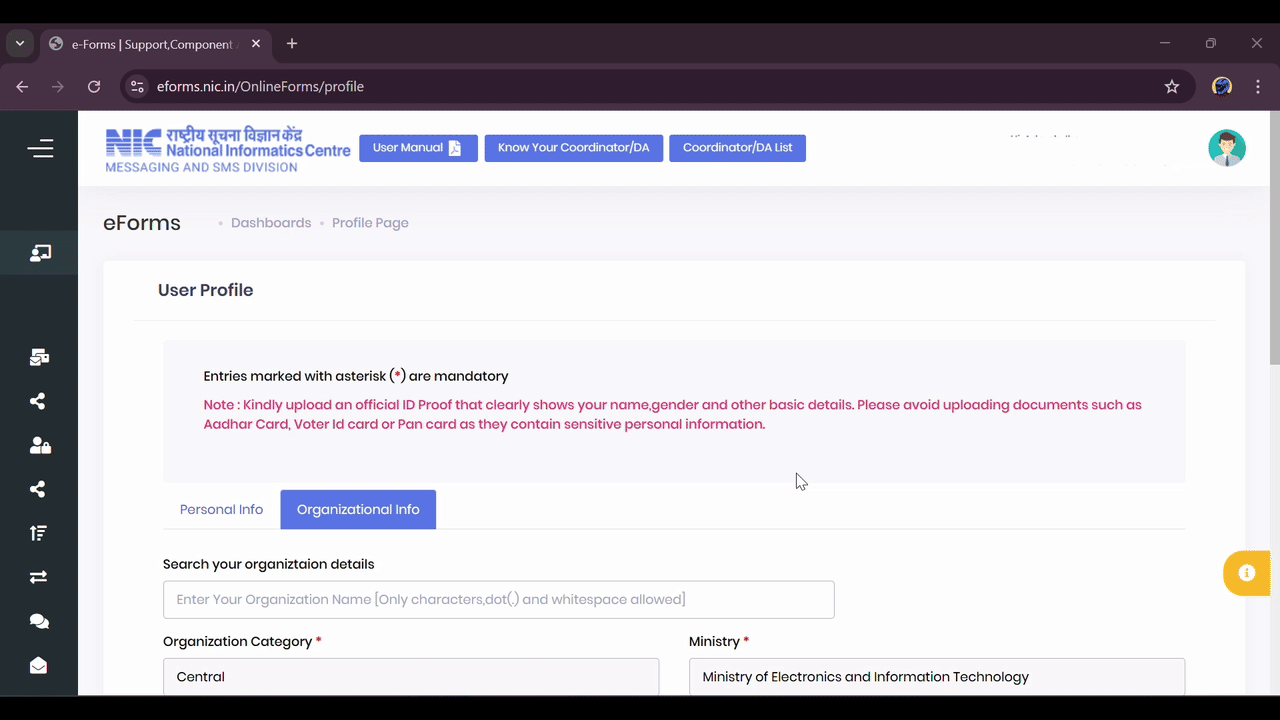
Complete User Profile
The 'User Profile' page will open. Fill in all 'Mandatory fields' and click 'Continue'.
Fill Organization Details
Fill in 'Organization details': select 'Organization Category', then 'Ministry & Department'. Type your 'reporting/nodal/forwarding officer's email id'. Check the declaration box and click 'Submit'.
Select VPN Service
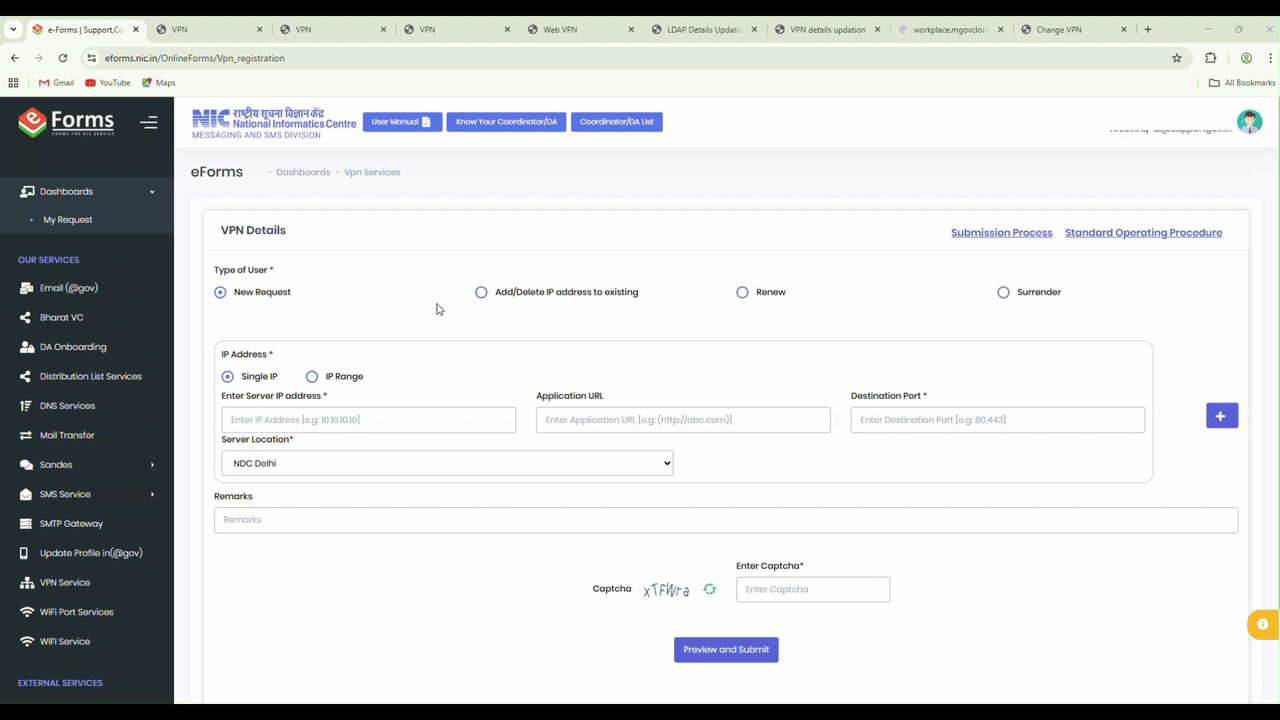
In the left-side panel, select the 'VPN Service' link to open the application form.
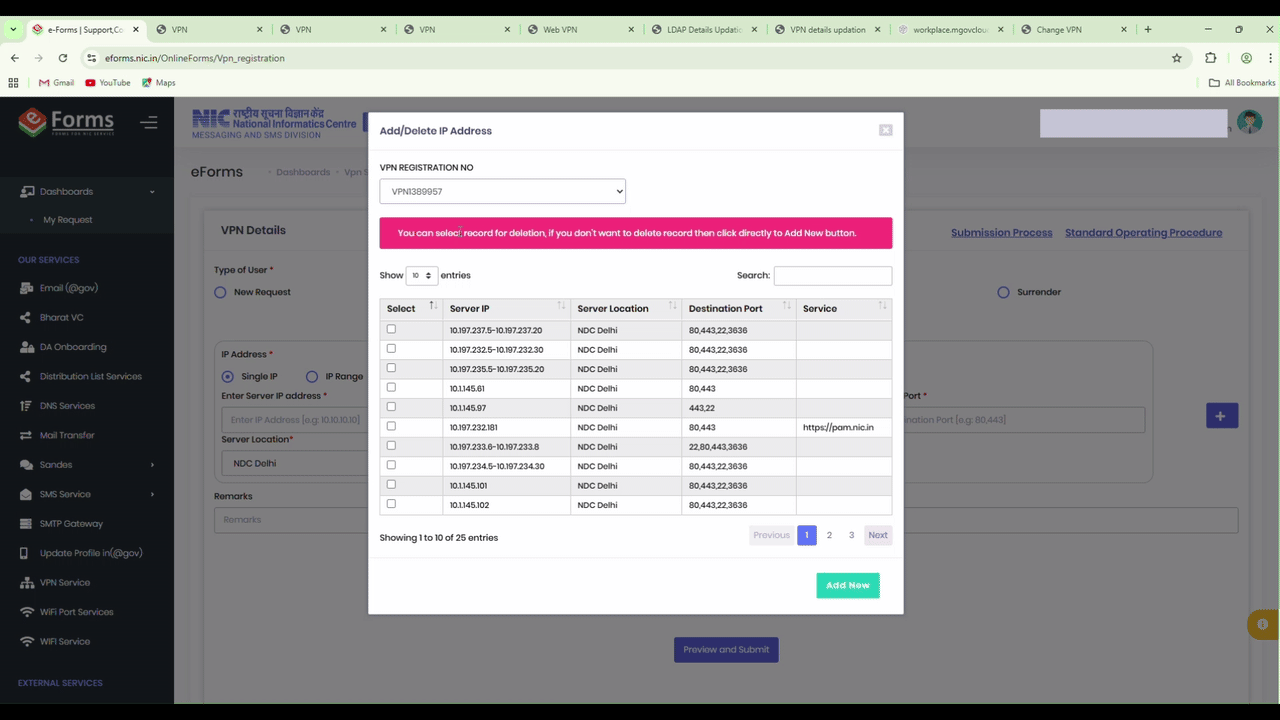
4. Add New Server IP/Port
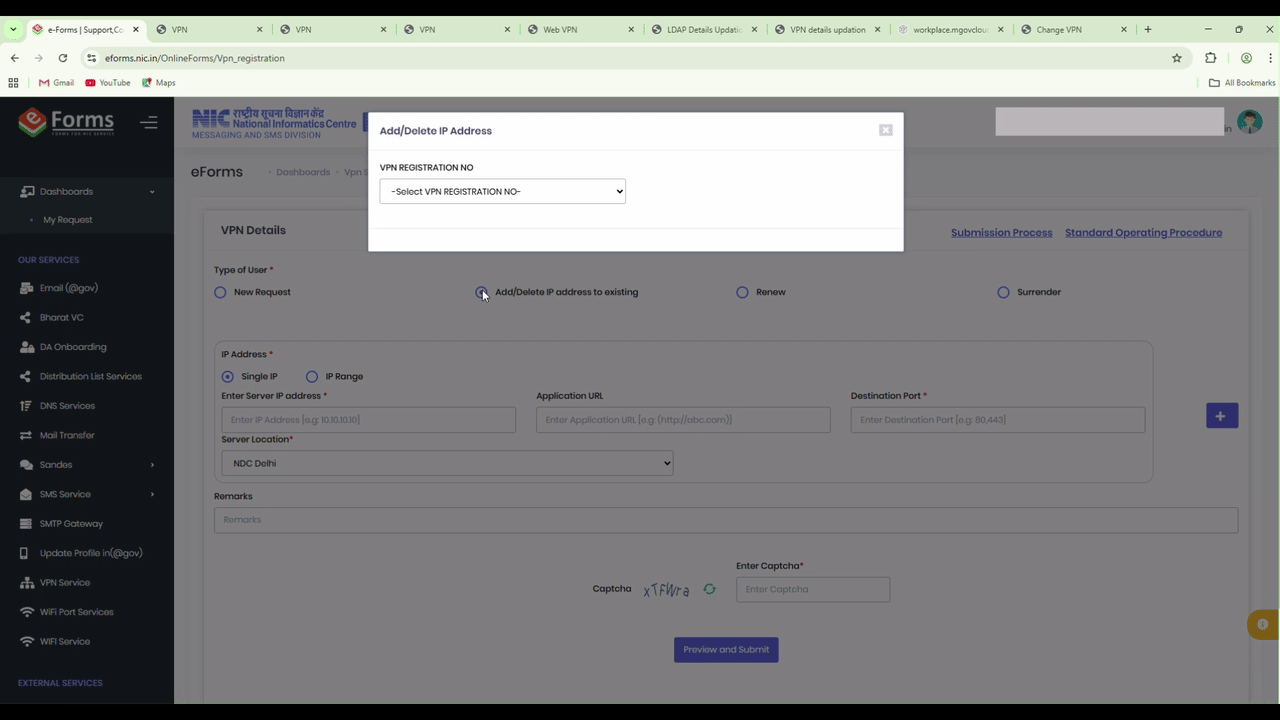
Select Add to Existing/Renew
In the VPN Details form, select 'Add to existing/Renew' under 'Type of user'.
Search Existing Request
Enter your 'existing VPN registration number' and 'Select it'
Click Add New
After the existing server IPs are displayed, click on the 'Add New' button.
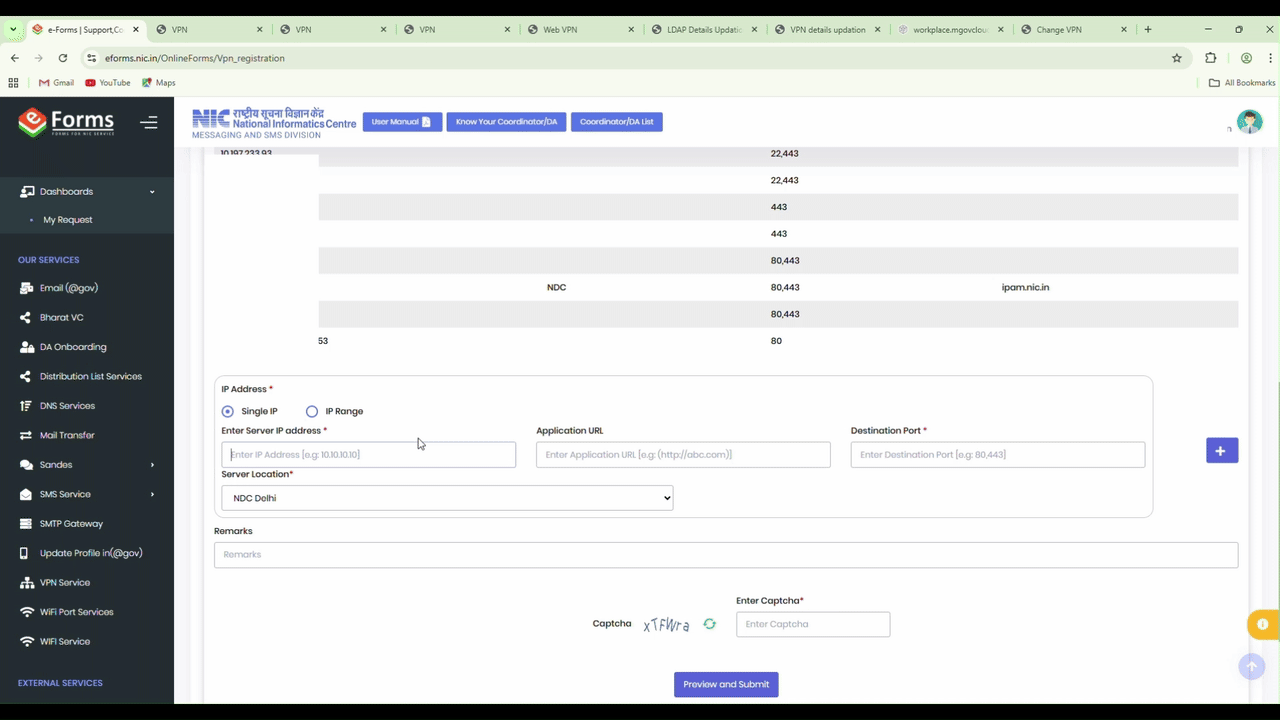
Enter New IP Details
Add the new 'Server IP address' (Single or IP Range), specify the 'Destination Port' numbers (e.g., 80,443), and fill in other required details. If you need to add more IP addresses, click the '[+]' button. Enter the 'Captcha' and click 'Preview and Submit'.
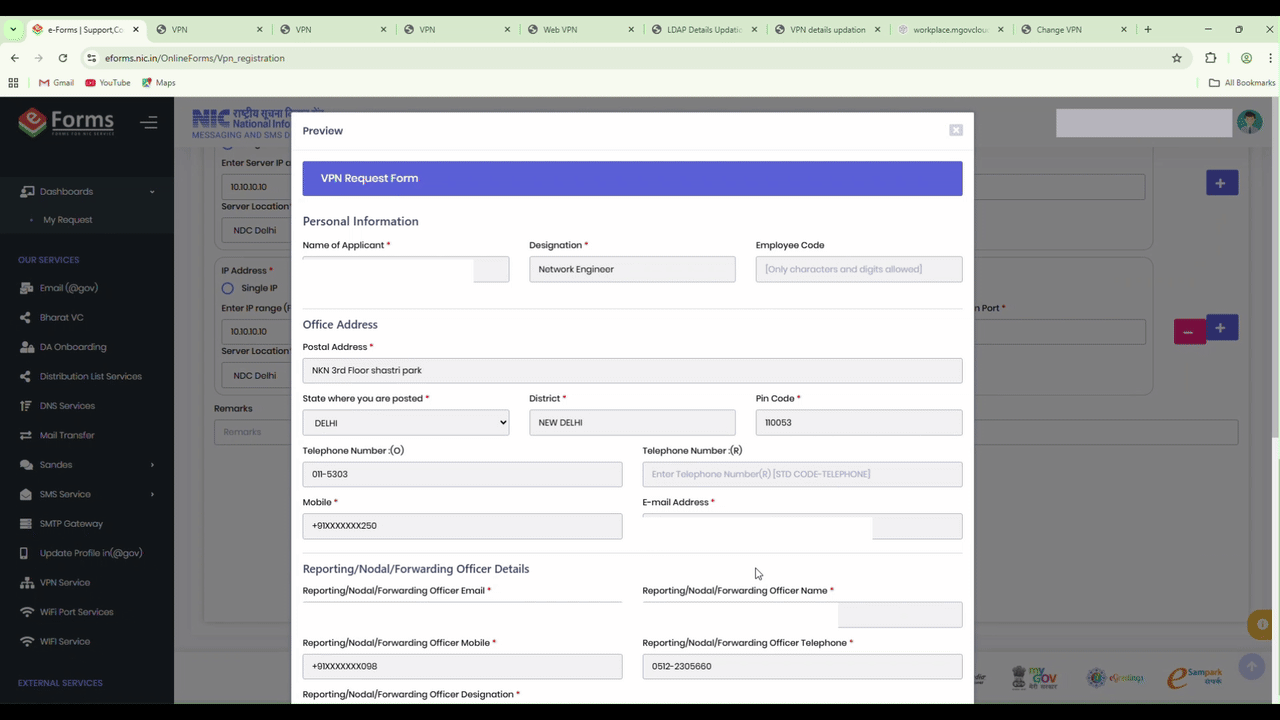
Final Review and Submission
Review the form, check the 'Terms and Conditions' box, click 'Submit', and then click 'Yes' on the confirmation.
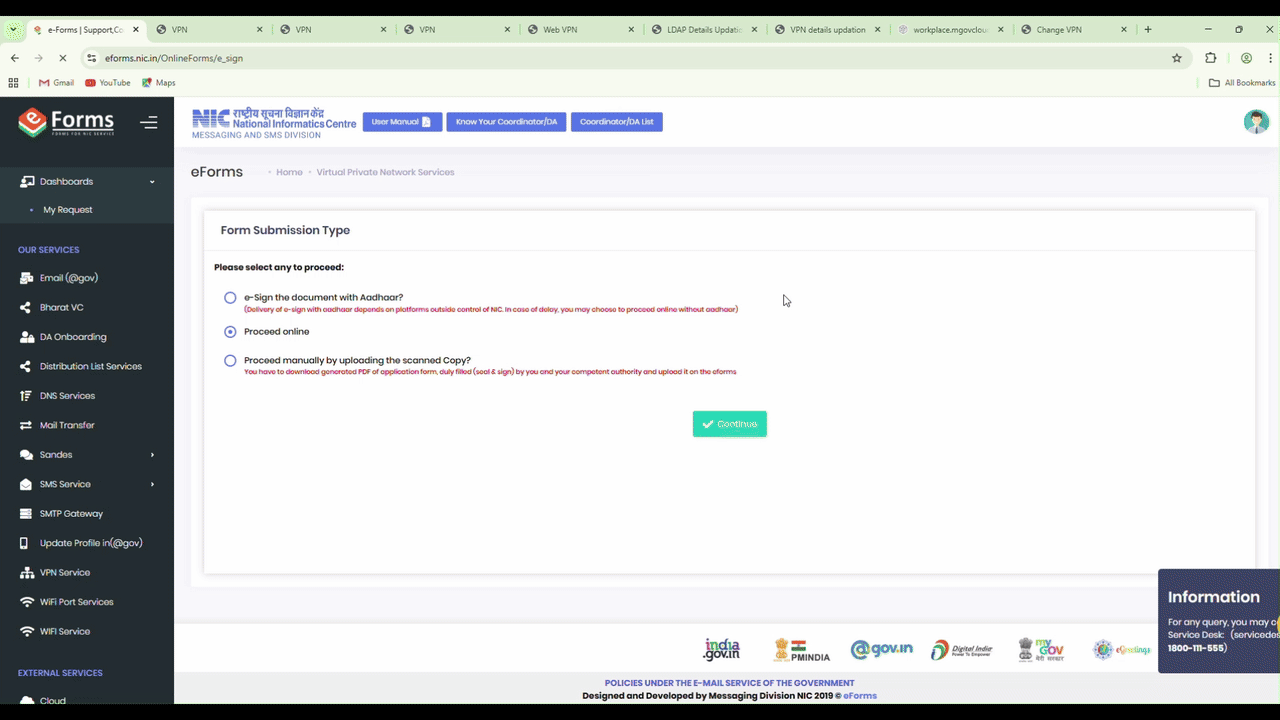
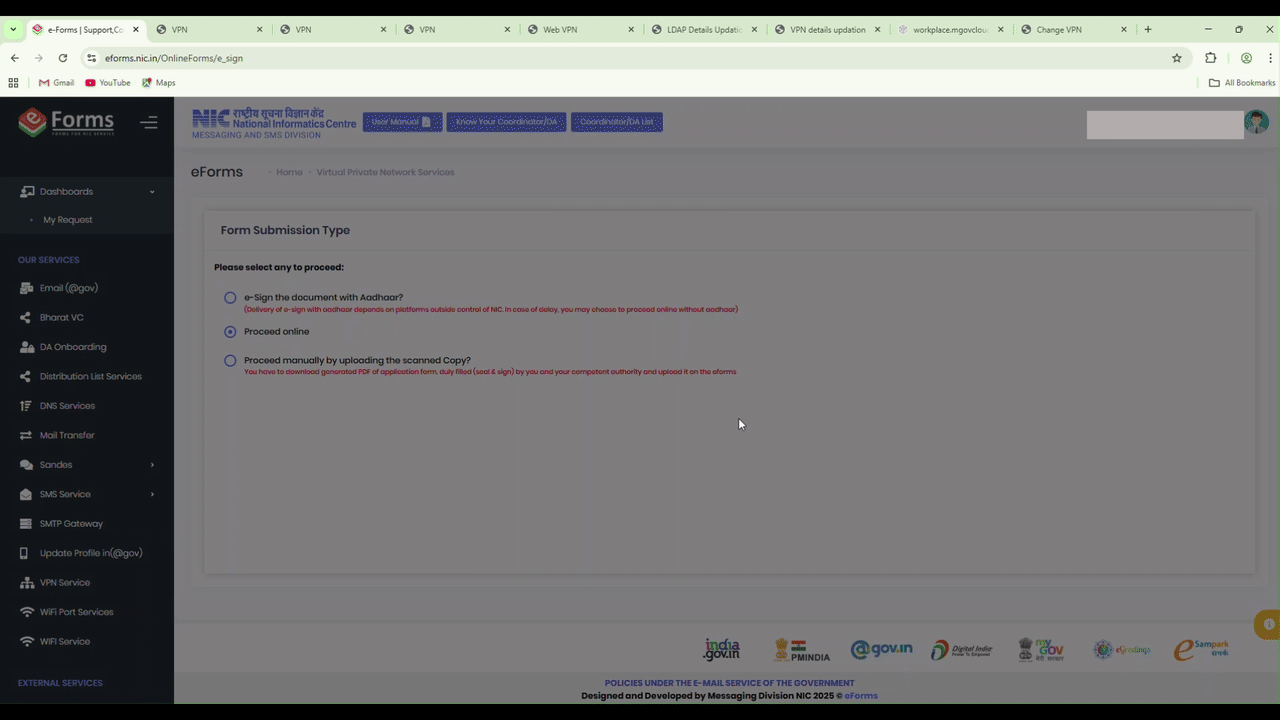
5. Final Confirmation and Tracking
Form Submission Type
Select the 'Proceed online' option and click 'Continue'.
Note Registration Number
After clicking Continue, a message will display providing the 'VPN Add/Modify registration number' (e.g., 'VPNADD-FORM202001010001'). Click 'Close' after noting the number.
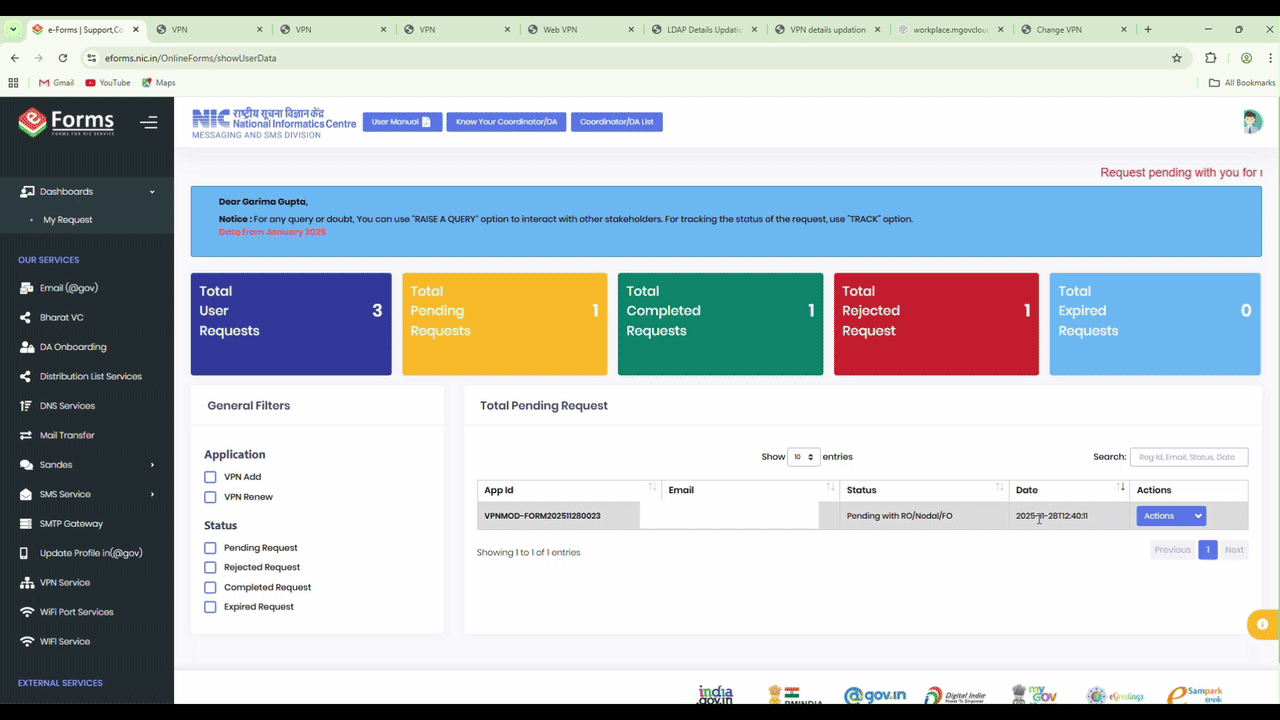
Track Application Status
You can track the status by selecting 'My Request' in the left-side panel and clicking 'Track' next to the application.