A. Join the Meeting
Go to URL and Download Client
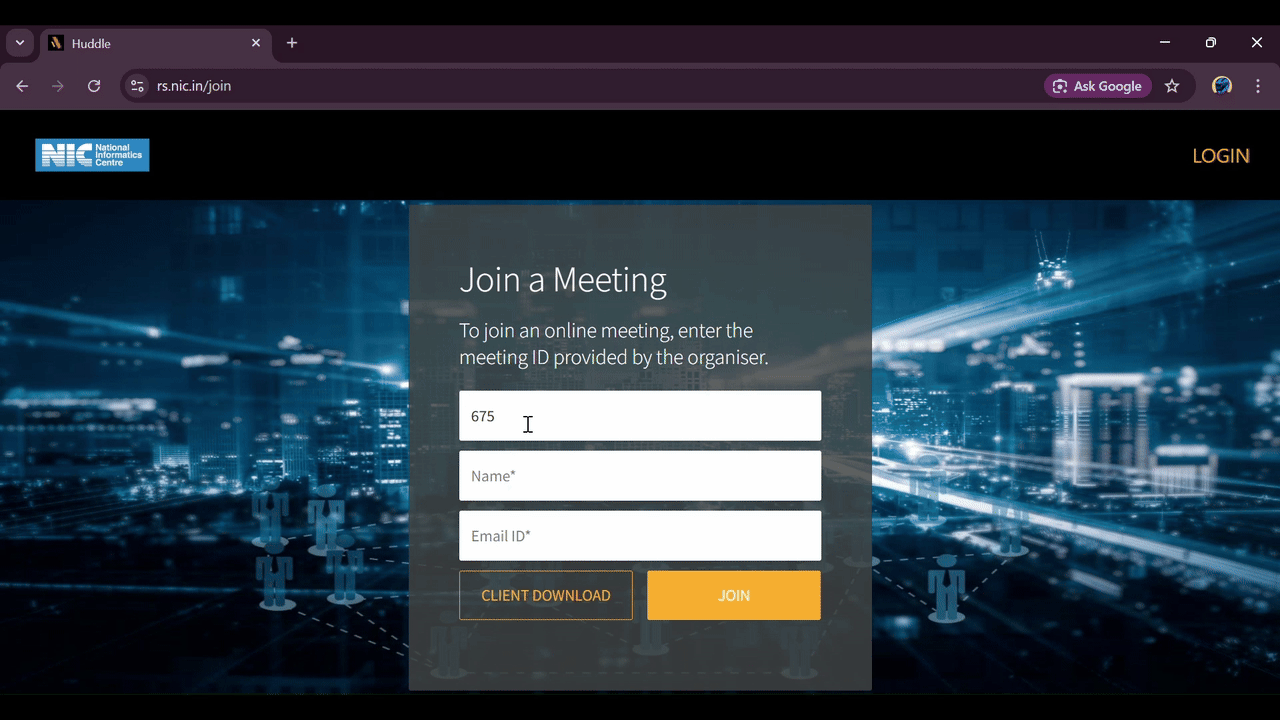
Go to the URL Huddle https://rs.nic.in/join and first 'Download the client'.

Enter Meeting Details and Launch
You can join the meeting either via the Meeting URL received over mail from the Organiser, or by entering a shared Meeting ID.
- If you use the meeting URL, the Meeting ID will be filled by default.
- If the organizer has only shared the meeting ID, enter the ID manually.
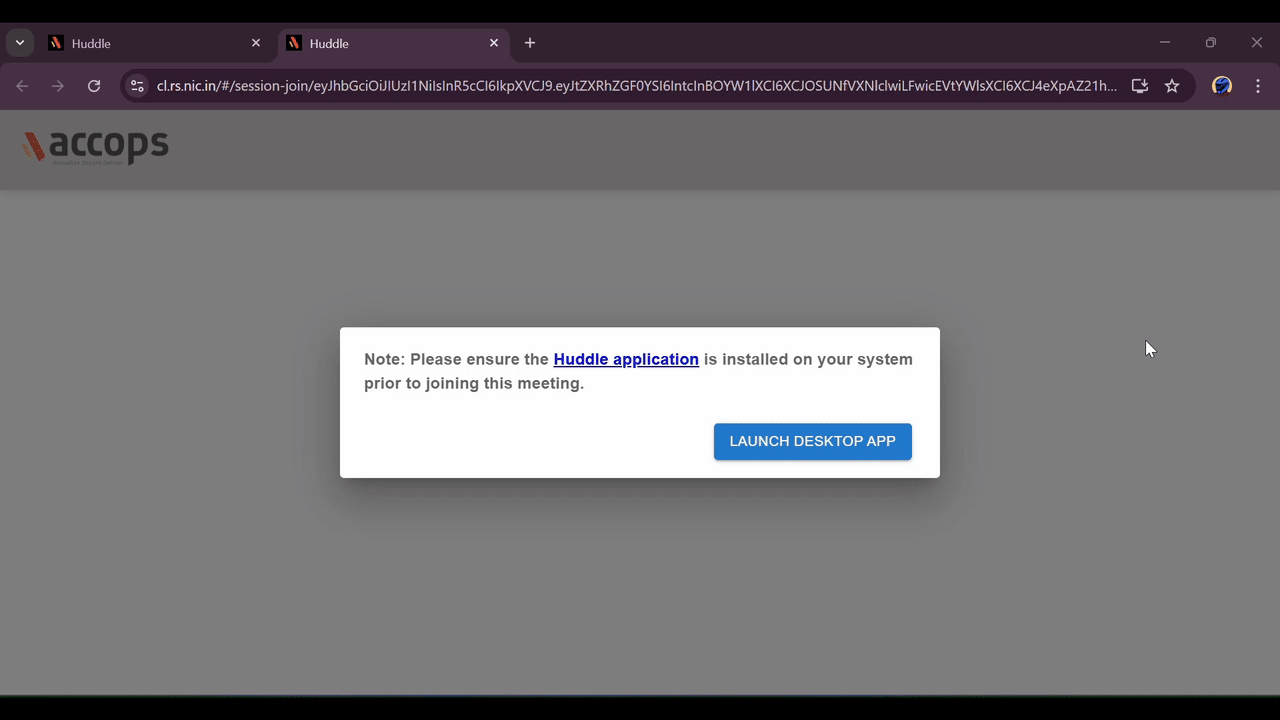
Launch Desktop App
When prompted to ensure the client is installed, click on 'Launch Desktop APP'.
B. Meeting Controls
Available Options
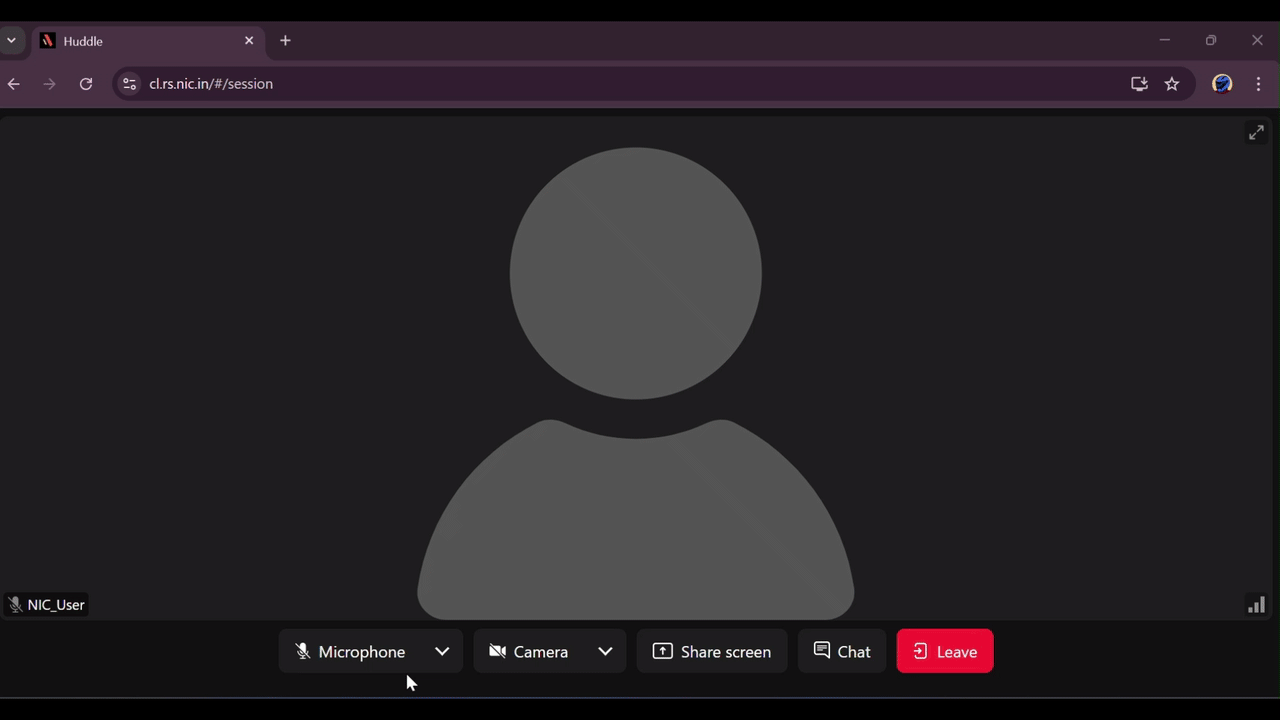
Once you join the meeting, you will have the following options at the bottom of the screen:
- Share screen option to share your screen.
- Microphone options to mute and unmute yourself.
- Chat option to share files and chat.
Request Remote Access
Once a screen is shared by another user, the user at the other end (the admin) will have the 'Remote Access' option to request control of the shared screen.
